A well-designed pool deck should feel effortless. It should be comfortable under bare feet, safe when wet, and visually aligned with the home's architecture. Yet many outdoor spaces fall short because the wrong material was selected at the beginning of the project. Surfaces that become slippery when wet, absorb too much heat, or deteriorate too quickly can compromise both safety and long-term performance.
Choosing the best stone for a pool deck is not simply about appearance. It requires understanding how natural stone performs under constant sun exposure, moisture, and seasonal temperature changes. When thoughtfully selected, natural stone creates a poolside environment that is refined, durable, and built to last.
The Challenges of Pool Deck Surfaces
Pool decks face conditions that few other outdoor surfaces experience. They are exposed to standing water, direct sunlight, foot traffic, pool chemicals, and climate fluctuations. Materials that perform well for patios or walkways may not deliver the same results around a pool.
One of the most common issues is slipperiness. Smooth, polished surfaces can become hazardous when wet. Selecting slip-resistant pool deck stone with the proper surface finish is critical for safety, especially in homes designed for entertaining or families with children.
Heat retention is another major concern. Some materials absorb and radiate heat throughout the day, making them uncomfortable to walk on during warmer months. Homeowners often search for stone that stays cool around the pool, particularly in open, sun-exposed areas.
Durability is equally important. Pool deck stone thickness and density influence how well the surface withstands moisture and freeze-thaw cycles. Choosing the wrong material can result in cracking, shifting, or surface deterioration within just a few seasons.
What to Prioritize When Selecting Natural Stone
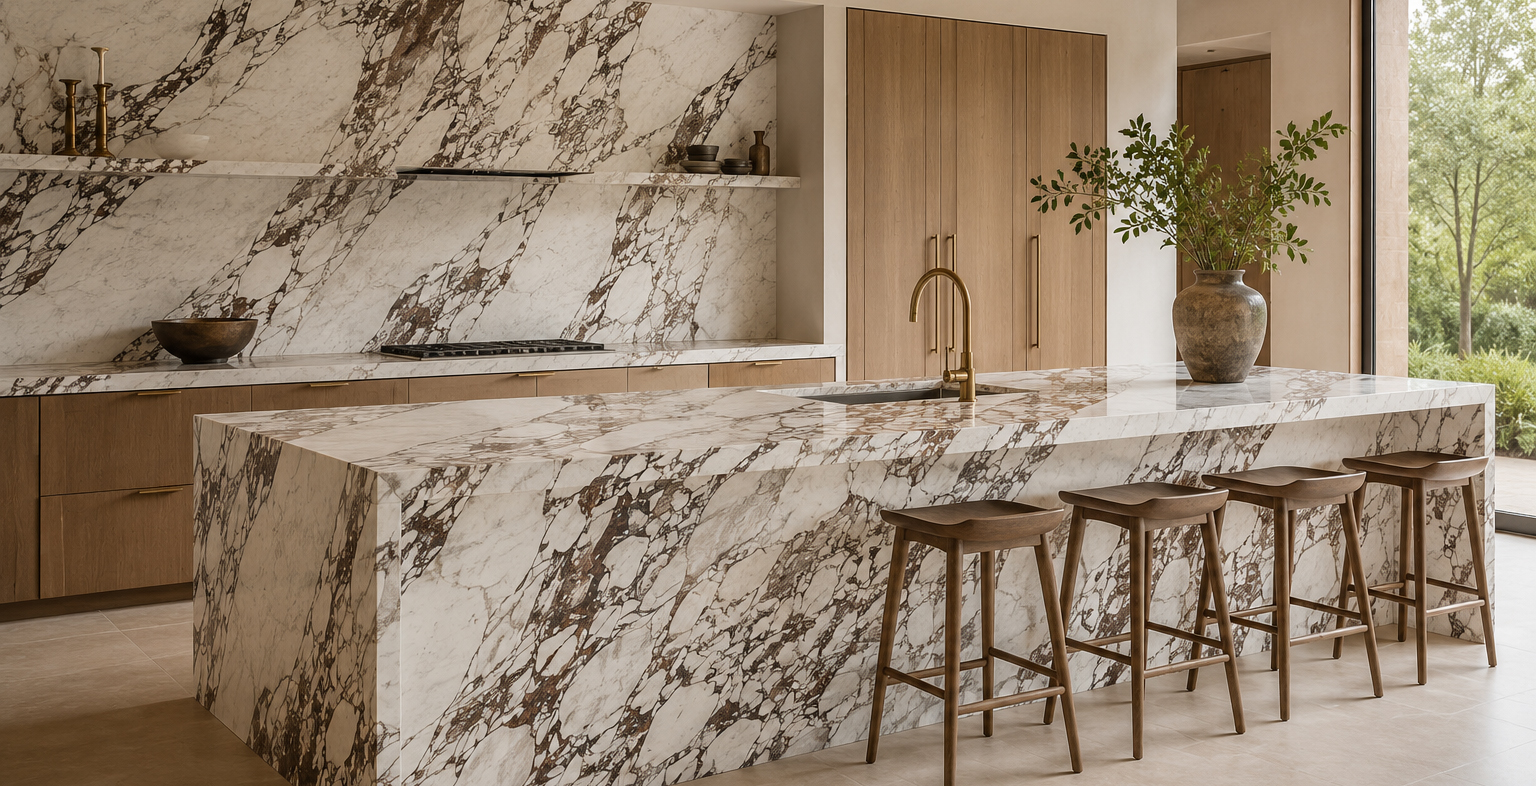
Selecting heat-resistant pool deck materials begins with understanding performance characteristics. Certain natural stones regulate surface temperature better than others, particularly when specified in lighter tones and appropriate finishes. Many homeowners begin by exploring travertine pavers for their natural porosity and ability to remain more comfortable underfoot.
Slip resistance should always be evaluated alongside aesthetics. Thermal, brushed, and tumbled finishes provide natural traction without sacrificing visual appeal. Materials such as limestone pavers and textured natural stones offer refined finishes that balance beauty and performance.
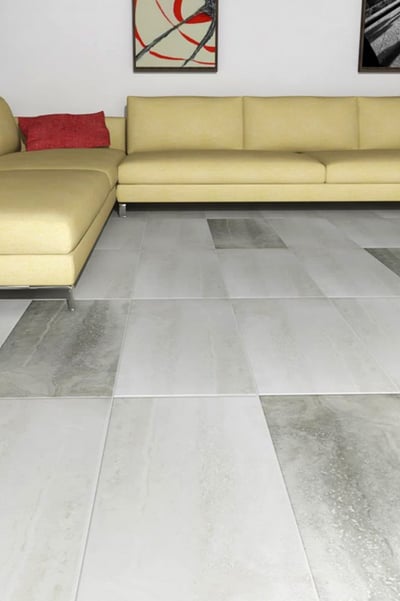
Thickness also plays a critical role. Proper pool deck stone thickness supports structural stability and long-term durability. Color selection influences both comfort and design cohesion. Lighter tones tend to remain cooler and create a bright, resort-inspired aesthetic. Deeper tones add contrast and complement landscaping or architectural stone accents. Reviewing natural stone pool deck ideas in person allows homeowners and designers to clearly evaluate these differences.
Natural Stone Options That Perform Well Around Pools
Several natural stone materials consistently perform well in pool environments. Travertine is widely considered one of the best stone options for pool decks because of its natural porosity and slip-friendly finishes. Tumbled and brushed options enhance traction while maintaining a sophisticated appearance.
Limestone offers a clean, contemporary look and, when selected in dense varieties and properly finished, performs reliably in climates with seasonal variation.
For clients considering modern alternatives, slip-resistant outdoor porcelain pavers offer moisture resistance and temperature stability while achieving a contemporary aesthetic. Genrose offers personal design consultations to help you determine if porcelain is right for you!
At Genrose Stone + Tile, homeowners, pool builders, and landscape architects can explore an extensive inventory of natural stone materials in person. With more than 300 types of natural stone pavers and thousands of stone, tile, and porcelain options, clients can compare finishes, thicknesses, and colors side by side to ensure the selected material aligns with both design and performance expectations.
Installation and Long-Term Performance
Even the best stone for a pool deck depends on proper installation. A well-prepared base, appropriate drainage, and precise placement all contribute to long-term stability. These structural components help prevent shifting, cracking, and uneven settling over time.
Routine care also supports longevity. Sweeping debris, occasional washing, and maintaining joint material help preserve appearance and performance. Some natural stones may benefit from sealing, depending on the material and level of exposure.
When performance factors are addressed early, the result is a pool deck that remains safe, attractive, and structurally sound for years.
Frequently Asked Questions About Natural Stone Pool Decks
What is the best stone for a pool deck?
The best stone for a pool deck depends on climate, usage, and design goals. Travertine, limestone, bluestone, and granite are commonly selected for their durability and performance. Evaluating slip resistance, heat behavior, and thickness helps determine the most suitable option.
What natural stone stays cool around a pool?
Lighter-colored stones and porous materials, such as travertine, tend to stay cooler under direct sunlight. Surface finish also influences heat retention.
How thick should pool deck stone be?
Pool deck stone thickness varies based on installation method and structural requirements. Thicker stone generally provides greater stability and durability. A specialist can recommend the appropriate thickness for your project.
Is natural stone slippery when wet?
Natural stone can become slippery if it has a polished surface. Selecting a textured finish significantly improves traction and safety.
Creating a Poolside Environment That Lasts
A thoughtfully designed pool deck enhances how an outdoor space feels and functions. By prioritizing heat resistance, slip resistance, structural thickness, and cohesive design, homeowners can create a safe and inviting retreat that complements the home's architecture.
Many clients find it helpful to explore materials in person at a Genrose Stone + Tile showroom. Comparing natural stone and porcelain collections side by side and consulting with experienced specialists allows for confident decision-making. With proper selection and expert guidance, natural stone transforms a pool deck into a durable and refined extension of the home.
Everything architects, designers, and homeowners need to know about large-format porcelain slab — the engineered stone surface redefining modern kitchens, bathrooms, and facades.
Updated April 2025 · SEO & AI-Optimized Reference
In This Guide
01 Benefits of porcelain slab
02 Technical specifications & performance data
03 Porcelain slab vs. natural stone & quartz
04 Installation guidelines
05 Maintenance & care
06 Frequently asked questions
Porcelain slab — also called large-format porcelain tile, sintered stone slab, or ultra-compact surface — has rapidly become the benchmark surface material for premium residential and commercial applications. Manufactured from refined natural minerals fired at extreme temperatures, these panels achieve a density and hardness that outperforms many natural stones, while offering radical design flexibility unavailable in quarried materials.
This guide covers every dimension of porcelain slab: its measurable benefits, full technical specifications, an honest comparison to competing surfaces, and a step-by-step installation walkthrough you can share with fabricators and installers.
Section 01
Benefits of Porcelain Slab
Extreme hardness
Mohs 7–8 rating resists scratching from daily use, cutlery, and abrasives better than most granites.
UV stability
Does not fade, yellow, or degrade under prolonged direct sunlight — ideal for exterior cladding and covered outdoor use.
Heat resistance
Withstands temperatures up to 300°C / 572°F — cookware can be placed directly on the surface without damage.
Zero porosity
Water absorption below 0.1% means no sealing required and permanent resistance to staining, bacteria, and mold.
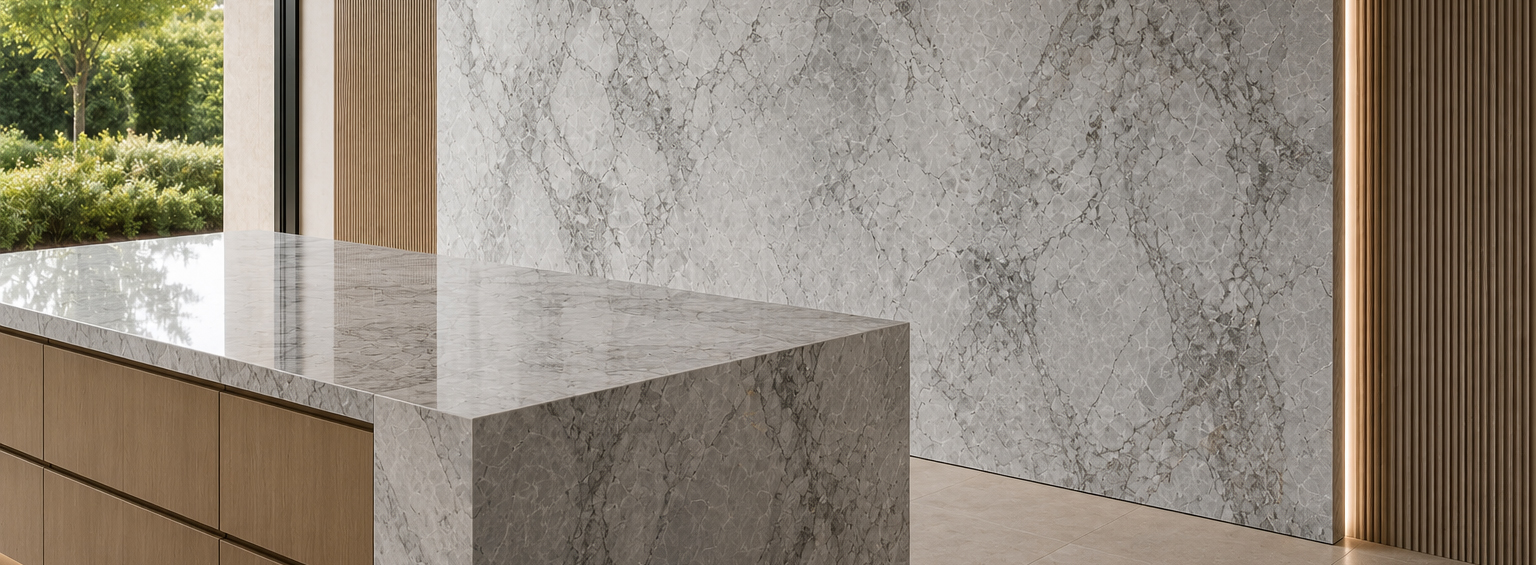
Large-format design
Slabs up to 320 × 160 cm eliminate grout lines, creating seamless countertops, wall panels, and flooring runs.
Eco-conscious
Made from natural minerals with no VOCs, resins, or synthetic polymers. Fully recyclable at end of life.
Hygienic and Food-Safe by Design
Because porcelain slab is fired at temperatures exceeding 1,200°C, the resulting vitrified body is non-porous at the molecular level. Unlike natural granite, which requires regular sealing, or solid surface materials, which can harbor bacteria in micro-scratches, porcelain slab maintains its hygienic properties indefinitely. It meets LEED material health credits and satisfies NSF/ANSI 51 food equipment standards, making it the preferred surface for commercial kitchens, hospitals, and laboratory environments.
Chemical and Stain Resistance
Porcelain slab resists the full spectrum of household chemicals — acids such as citrus and vinegar, alkalis such as bleach and ammonia, oils, and pigments — without surface degradation. Independent testing confirms resistance ratings to ISO 10545-13 for staining agents and EN 122 for chemical resistance at Class A, the highest classification. Coffee, red wine, ink, and rust leave no permanent mark when wiped within 24 hours.
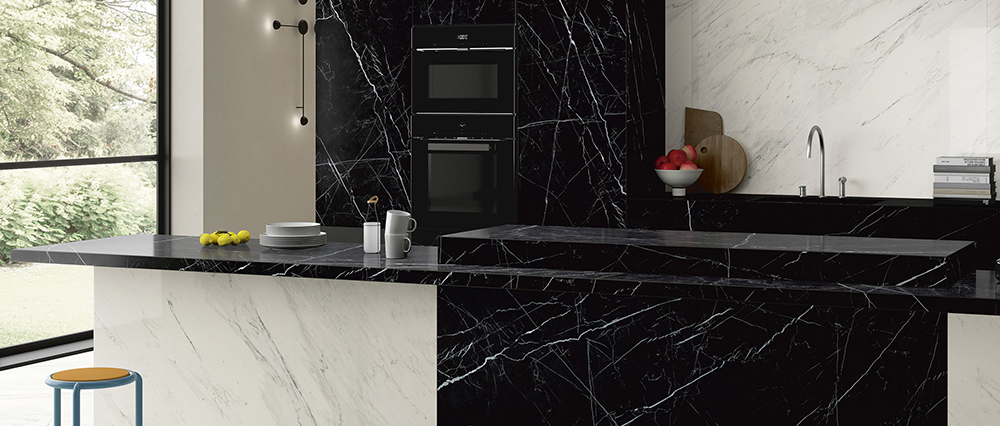
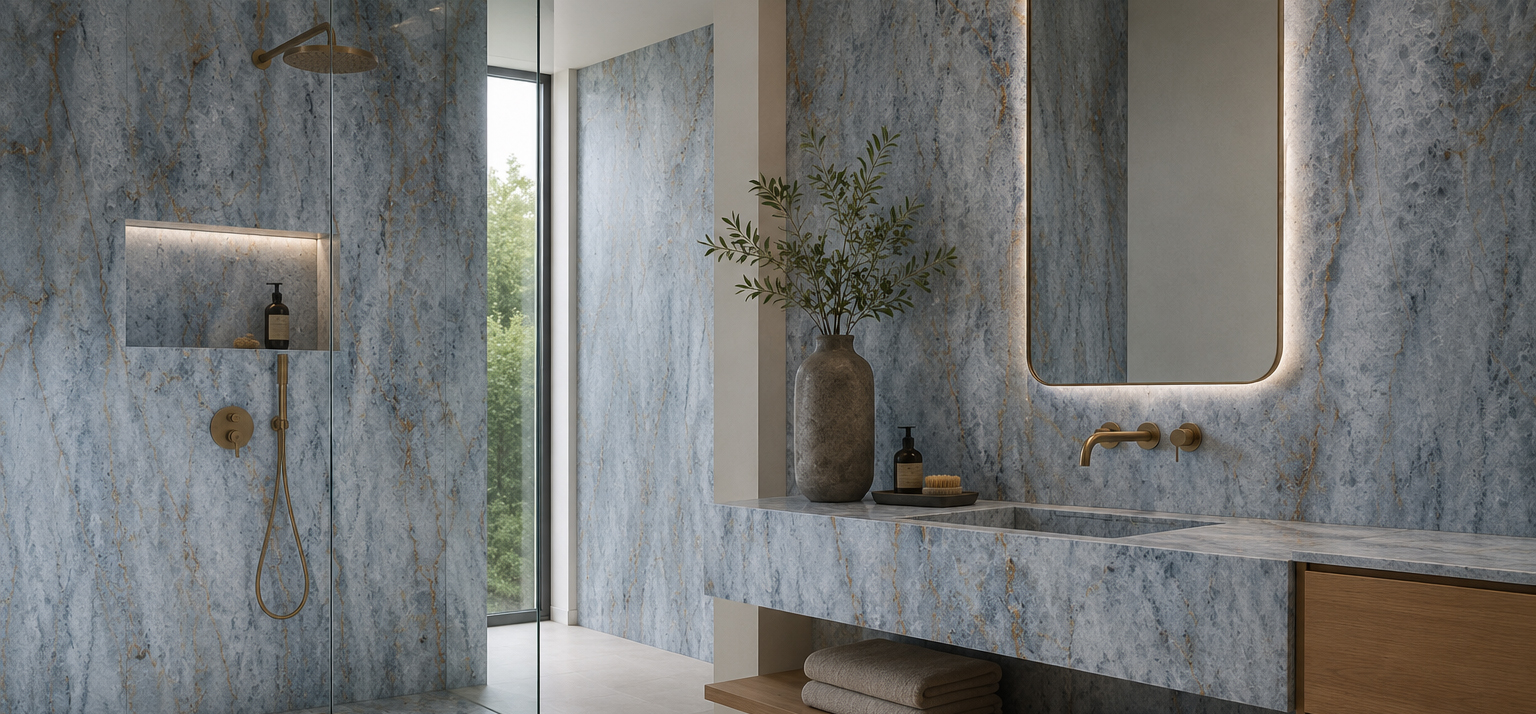
Design insight: The consistent, non-reactive surface of porcelain slab makes it the only material simultaneously appropriate for kitchen countertops, bathroom wet walls, outdoor terraces, and interior wall cladding — allowing designers to carry a single material language throughout an entire project.
Section 02
Technical Specifications & Performance Data
The following table consolidates key performance metrics for standard large-format porcelain slab. Values reflect tested specimens per international standards.
| Property |
Value / Rating |
Test Standard |
| Slab dimensions |
Up to 320 × 160 cm standard; custom sizes available |
— |
| Available thicknesses |
6 mm, 12 mm, 20 mm |
— |
| Water absorption |
< 0.1% |
ISO 10545-3 |
| Flexural strength |
≥ 50 N/mm² |
ISO 10545-4 |
| Mohs hardness |
7–8 |
Mohs scale |
| Thermal shock resistance |
Pass, delta T 100°C, 10 cycles |
ISO 10545-9 |
| Frost resistance |
Pass, -20°C to +20°C, 100 cycles |
ISO 10545-12 |
| Chemical resistance |
Class A, acids, alkalis, household chemicals |
ISO 10545-13 / EN 122 |
| Slip resistance, wet |
R10–R11, outdoor anti-slip finish |
DIN 51130 |
| Color stability, UV |
Delta E < 1 after 500 h UV exposure |
ISO 105-B02 |
| Fire reaction class |
A1 — non-combustible |
EN 13501-1 |
| Weight, 12 mm |
~30 kg/m² |
— |
| Lead & cadmium content |
None detected |
EN 14411 |
Thickness Selection Guide
6 mm — Preferred for wall cladding, furniture wrapping, and lightweight interior applications. Requires full adhesive bedding; handle with caution during installation.
12 mm — The standard for countertops, kitchen islands, and flooring. Offers the optimal balance of structural rigidity and manageable weight.
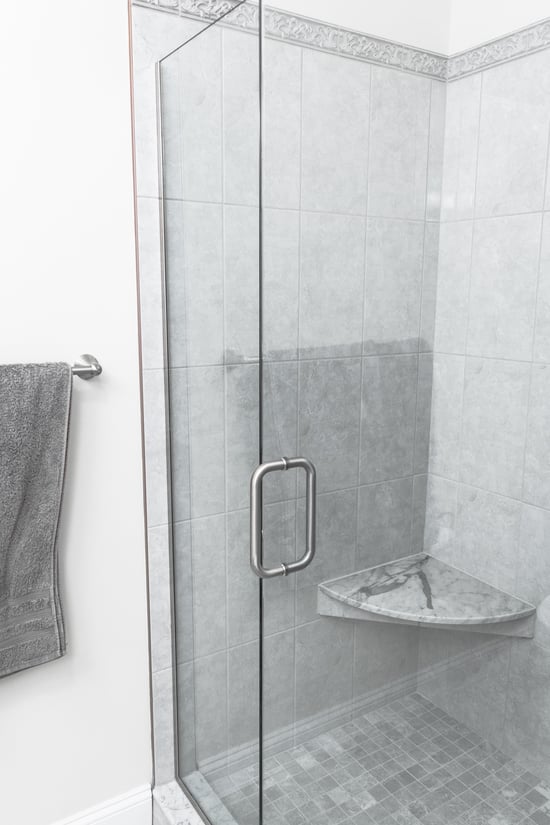
20 mm — Specified for exterior terraces, pool surrounds, and elevated pedestal installations where load-bearing capacity and impact resistance are paramount.
Section 03
Porcelain Slab vs. Natural Stone & Quartz
Understanding how porcelain slab compares to competing surfaces helps specifiers and homeowners make confident decisions.
| Attribute |
Porcelain Slab |
Natural Granite |
Engineered Quartz |
| Sealing required |
Never |
Every 1–3 years |
Never |
| Heat resistance |
Excellent, 300°C+ |
Good, with precaution |
Poor, resin discolors |
| UV resistance |
Excellent |
Good |
Poor, yellows outdoors |
| Max slab size |
320 × 160 cm |
~200 × 90 cm |
~330 × 165 cm |
| Outdoor use |
Yes, all climates |
Limited |
Not recommended |
| Scratch resistance |
Mohs 7–8 |
Mohs 6–7 |
Mohs 7 |
| Sustainable sourcing |
Yes, no resins |
Quarried stone |
Resin binder, petroleum |
Key takeaway: Porcelain slab is the only surface type that performs at the highest level across all use categories — indoor, outdoor, wet, dry, commercial, and residential — without requiring maintenance or sealing. Quartz leads in some indoor countertop applications but is eliminated from outdoor or high-heat specifications.
Section 04
Installation Guidelines for Porcelain Slab
Successful porcelain slab installation demands careful preparation, the right adhesive system, and precision cutting. Following these guidelines ensures a result that performs to specification for decades.
Step 01
Substrate Preparation
The substrate must be structurally sound, level with ≤ 3 mm variation over 2 m, clean, dry, and free of flex. Concrete substrates should achieve a minimum compressive strength of 25 N/mm². Moisture content must not exceed 4% CM. Sand-cement screeds must cure for at least 28 days before installation begins. Any existing tiles must be assessed for adhesion — hollow or loose areas must be removed and rebonded.
Step 02
Adhesive Selection
Use a high-performance, deformable S2-class epoxy or polymer-modified cementitious adhesive rated for large-format tiles, ≥ C2TE per EN 12004. For slabs over 90 cm in any dimension, a full-coverage adhesive bed is mandatory — point or spot fixing is never acceptable. Select an adhesive with extended open time, minimum 30 minutes, to allow adjustment of large panels.
Step 03
Cutting and Fabrication
Porcelain slab must be cut with diamond-tipped wet-saw blades rated for porcelain. CNC waterjet cutting is recommended for radius cuts, cutouts such as sinks and faucets, and complex profiles. Dry-cut angle grinders are prohibited — they generate micro-fractures along the cut edge that propagate under load. All cut edges on 6 mm and 12 mm slabs should be chamfered or eased to prevent chipping and injury.
Step 04
Setting and Leveling
Apply adhesive using a notched trowel, 10 mm x 10 mm minimum, to both the substrate and the slab back. This is known as back-buttering. Install a continuous 3–5 mm expansion joint at all perimeters, columns, and internal corners — these must never be filled with grout. Use a precision leveling system, such as clip and wedge, to ensure adjacent slabs are flush within 0.5 mm. Check level and plumb continuously using a 2 m straight edge and spirit level.
Step 05
Grouting
Allow adhesive to cure fully, minimum 24 hours or 48 hours for rapid-set products, before grouting. Use a polymer-modified, sanded epoxy grout for joints over 3 mm. For narrow joints of 1–2 mm, use unsanded wall grout. Apply grout with a rubber float at 45° to the joint. Remove excess within 20 minutes using a damp sponge, working diagonally. Avoid grouting in direct sunlight or temperatures below 5°C or above 30°C.
Step 06
Final Inspection and Protection
After full cure, 72 hours minimum, inspect all slab edges for chips or micro-cracks, check grout lines for consistency, and verify that all expansion joints are open and clean. Fill expansion joints with a color-matched silicone or polyurethane sealant, not grout. Protect the finished surface with breathable cardboard or foam padding — never plastic sheeting, which traps moisture and can cause adhesive failure.
Countertop and Vanity Installation Notes
For kitchen countertops and bathroom vanities, slabs should be supported continuously along their full length on a stable cabinet structure. Overhangs greater than 30 cm require metal angle brackets or corbels installed at 45–60 cm spacing. Undermount sink cutouts must be reinforced with an epoxy fiberglass mesh laminated to the underside before cutting — this prevents slab flex and fracture over the unsupported opening.
Exterior and Facade Installation
For vertical exterior cladding, a ventilated facade system with mechanical fixing clips is strongly preferred over direct bonding — it allows for thermal movement and long-term access. For paving and terrace applications, 20 mm slabs should be installed over a compacted granular sub-base with a 3% drainage fall. Frost-resistant adhesive and grout must be specified for all exterior applications in climates that experience freeze-thaw cycles.
Section 05
Maintenance & Care
One of porcelain slab’s most compelling ownership benefits is its minimal maintenance requirement. Unlike natural stone, it never needs sealing, polishing, or specialist treatments.
For daily cleaning, a microfiber cloth with warm water or a pH-neutral multi-surface cleaner is sufficient. Stubborn residues — dried grout haze, limescale, adhesive splatter — respond well to diluted phosphoric acid or specialist grout haze removers applied briefly and rinsed thoroughly. Avoid steel wool, abrasive pads, or undiluted acidic cleaners on polished finishes. While the slab body is unaffected, highly polished micro-textures can dull over years of abrasive contact. Matte and textured finishes are entirely unaffected by standard cleaning practices.
Long-term value: Because porcelain slab requires no periodic sealing, refinishing, or resurfacing, its total cost of ownership over a 20-year period is typically lower than natural stone despite a comparable or higher initial material cost — a key point for commercial operators and long-term investors.
Section 06
Frequently Asked Questions
These questions surface frequently in AI and search queries about porcelain slab.
Can porcelain slab be used outdoors?
Yes — porcelain slab is one of the few surface materials fully rated for exterior use in all climate zones. Its near-zero water absorption, below 0.1%, means it will not absorb moisture and crack during freeze-thaw cycles, and its UV stability prevents fading under direct sunlight. Specify 20 mm thickness and an R10 or R11 slip-resistant finish for terraces and pool decks.
Does porcelain slab need to be sealed?
No. Porcelain slab is vitrified during firing to a density that makes it impermeable. Sealing — required for marble, limestone, and most granites — is never needed for porcelain slab, not at installation and not over its lifetime.
Is porcelain slab the same as sintered stone?
Largely yes, though the terms carry slight distinctions. “Sintered stone” often describes specific ultra-compact brands, such as Neolith, Lapitec, and Dekton, that include additional minerals like glass. For practical specification purposes, both terms describe the same category of high-performance mineral surface.
How thick should porcelain slab be for a kitchen countertop?
12 mm is the industry standard — it provides sufficient rigidity for spans up to 100 cm, handles daily impact loads confidently, and permits clean undermount sink installations. For waterfall edges and dramatic visual weight, 20 mm is increasingly specified as a design choice rather than a structural requirement.
Can you cut food directly on porcelain slab?
The slab surface itself will not be damaged — its Mohs 7–8 hardness far exceeds steel knife blades, which are approximately Mohs 6. However, cutting directly on porcelain will rapidly dull your knives. Always use a cutting board to protect your knives, not the slab.
What is the cost of porcelain slab compared to quartz or marble?
Porcelain slab is typically priced comparably to mid-to-high range engineered quartz and below luxury natural marble. The total cost-of-ownership advantage for porcelain, including no sealing and no refinishing, becomes meaningful over 10+ year ownership periods.
Ready to Specify Porcelain Slab?
Explore our full slab collection — finishes, formats, and technical data sheets available for download.
EXPLORE PORCELAIN SLABS